Using Smart Wallet with the Typescript SDK
By using the wallet SDK alongside the TypeScript SDK, you can use smart wallets in your applications easily.
Example Use Cases
The wallet SDK with the TypeScript SDK is primarily used when creating a backend for your application or when creating a node script. In this guide, we will be using the wallet SDK to create a Node script but the logic for creating a backend is the same.
If you are working in a React environment, you are recommended to follow this guide.
1. Deploy an Account Factory
Deployable via the explore page or build your own ERC 4337 compatible factory contract using the Solidity SDK.
Choose the right smart wallet setup for your app. thirdweb offers the following three different kinds of smart wallets:

Read about the differences between the three smart wallet types here.
2. Create an API key
To use the smart wallet bundler and paymaster you need to create an API key and a billing account.
To create an API Key:
- Head to the settings page in the dashboard and click the API Keys tab.
- Click on Create API Key:
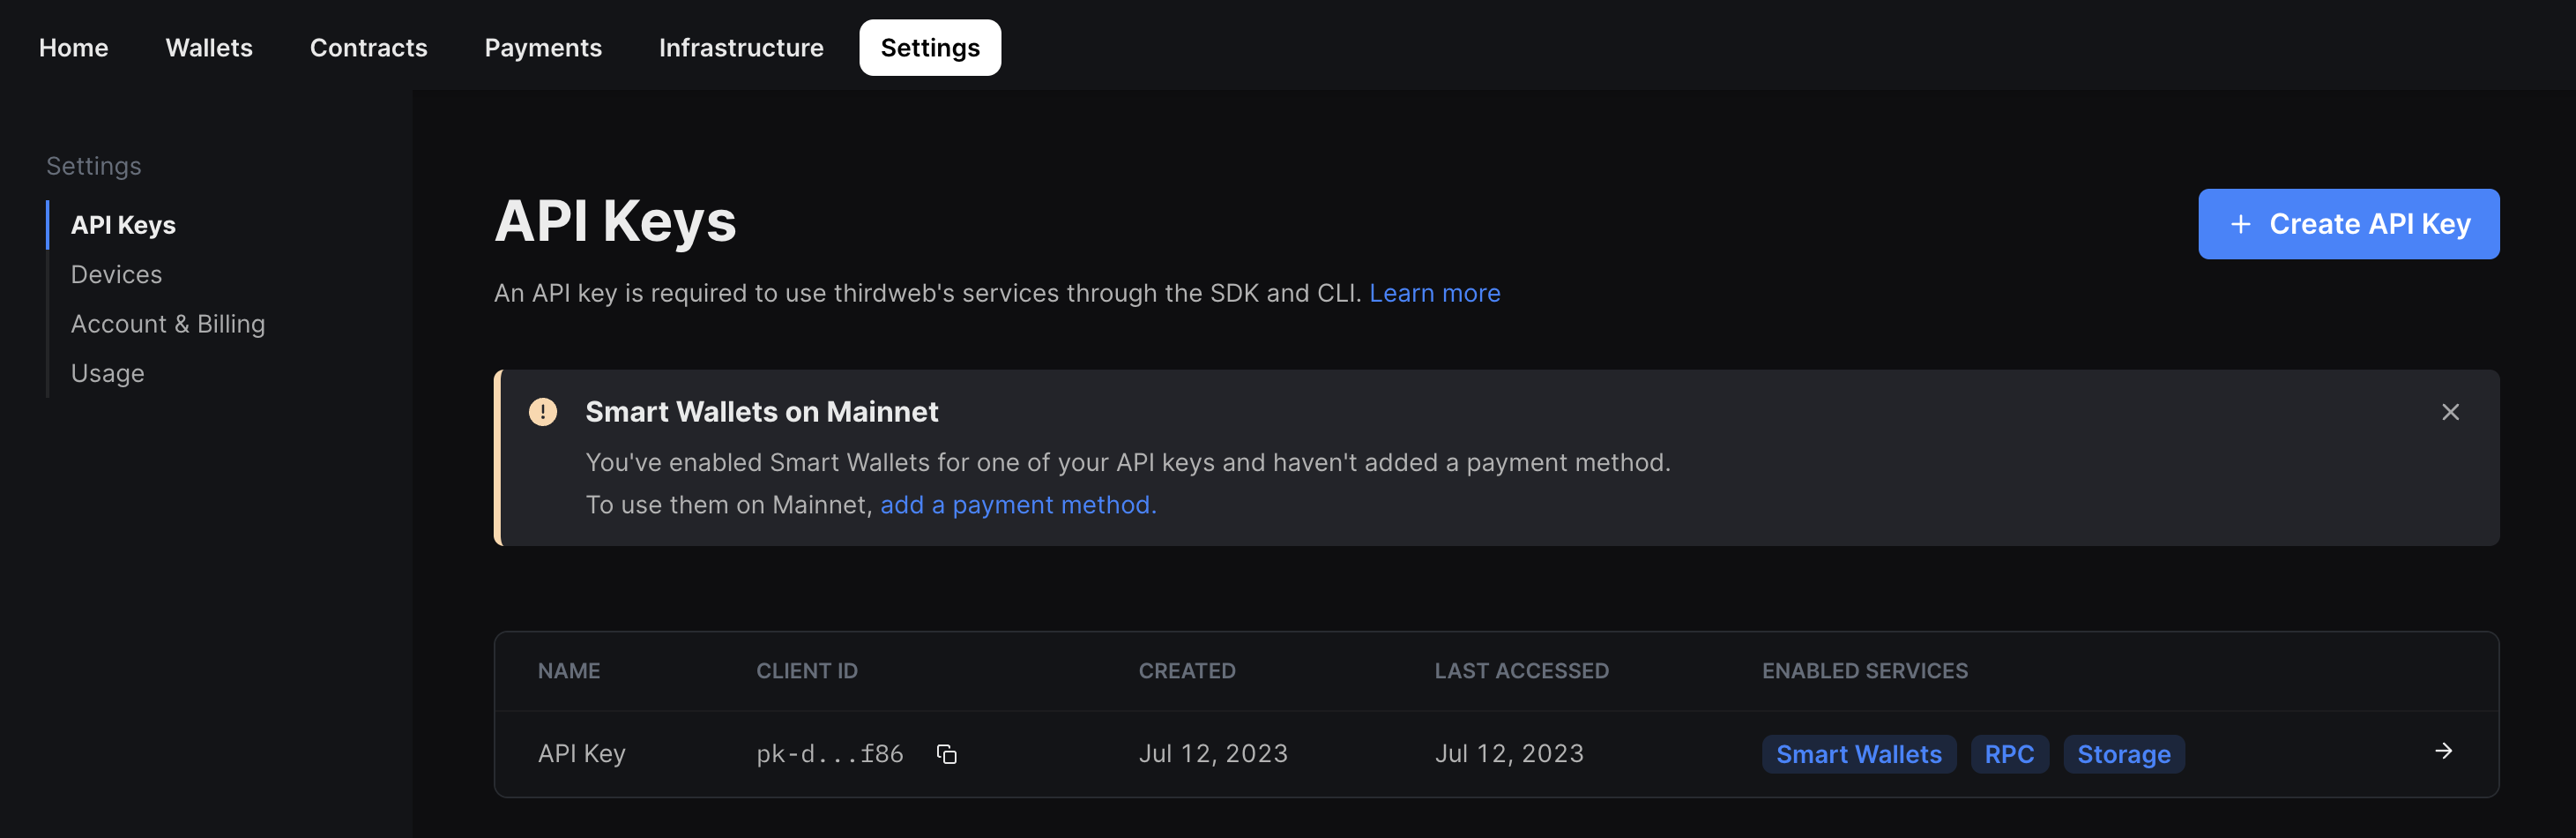
- Give your API key a name and click Next.
- Make sure that the Smart Wallets services are enabled and any addresses that your deployed smart accounts interact with are added to the Allowed Contract Addresses section:

- Click Next and then ignore the Set Access Restrictions section. If you are using the smart wallet as part of a client side application, you will need to add the domains/ bundle IDs of your application here but since we will be writing a script, we do not need this. Click "Create" to create your key.
- Copy your Secret Key and store it in a safe place such as a password manager. You will not be able to see this key again.
- Click I Have Stored the Secret Key Securely and your key will now be visible from the API Keys table.
- Note: to edit your private key at any point, click on the key from the table and then click on the Edit button.
In order to use smart wallets on mainnet you will also need to create an account and add a paymet method.
3. Create a Node Script
3.(a) Using the Create Command
To use smart wallets in a node script, we are going to setup our project using the CLI create command. Open your terminal and run:
npx thirdweb create app
When promted, select/input the following options:
- A name for the project
EVMas the blockchainNode.jsas the environmentTypeScriptas the language
This will create a repository. Open it in your code editor.
Create a .env file and add the following:
THIRDWEB_SECRET_KEY=<YOUR_SECRET_KEY>
Open the index.ts file and delete the starter script, we won't need it.
3.(b) Creating the Personal Wallet Key
This smart wallet is unlocked by a 'key' - a personal account. This key can be anything from a MetaMask wallet or even a Local Wallet and is used as a way to 'sign in' to the wallet.
First install the wallets package if you haven't already:
yarn add @thirdweb-dev/wallets
To create a personal wallet key, we are going to use the Local Wallet, which we need to import from the @thirdweb-dev/wallets package, and store it in an ecrypted JSON file.
import { LocalWalletNode } from "@thirdweb-dev/wallets/evm/wallets/local-wallet-node";

// Load or create personal wallet
// here we generate LocalWallet that will be stored in wallet.json
const personalWallet = new LocalWalletNode();
await personalWallet.loadOrCreate({
  strategy: "encryptedJson",
  password: "password", // or any password
});
const personalWalletAddress = await personalWallet.getAddress();
console.log("Personal wallet address:", personalWalletAddress);
3.(c) Creating the Smart Wallet
Now, let's create a smart wallet using the SmartWallet class from the @thirdweb-dev/wallets package.
To do this, we need to pass a SmartWalletConfig object to the constructor. This object contains the following properties:
chain: the chain that the smart wallet will be deployed on.factoryAddress: the address of the account factory contract.secretKey: the secret key that we created earlier.gasless: whether the smart wallet should be gasless or not.
Once we have created the config and instantiating the SmartWallet class, we can connect the personal wallet to the smart wallet using the connect method.
// Configure the smart wallet
const config: SmartWalletConfig = {
  chain: "goerli",
  factoryAddress: "0x...", // your factory address
  secretKey: process.env.THIRDWEB_SECRET_KEY as string,
  gasless: true,
};

// Connect the smart wallet
const smartWallet = new SmartWallet(config);
await smartWallet.connect({
  personalWallet,
});
To view all of the methods on the SmartWallet class, view the Wallet SDK documentation.
3.(d) Instantiate the thirdweb SDK
Now that we have created a smart wallet object and connected it, we can instantiate the thirdweb SDK with the smart wallet using the fromWallet method.
// now use the SDK normally to perform transactions with the smart wallet
const sdk = await ThirdwebSDK.fromWallet(smartWallet, chain, {
  secretKey: secretKey,
});

console.log("Smart Account addr:", await sdk.wallet.getAddress());
console.log("balance:", (await sdk.wallet.balance()).displayValue);
We have also passed our secretKey to the SDK so that we can use the smart wallet bundler and paymaster.
We have also added some helpful logs to view the smart wallet address and balance using the associated balance and getAddress methods.
3.(d) Using the Smart Wallet
In order to follow this specific example, you will need the following setup:
- Deploy a token drop contract deployed on Goerli.
- Claim conditions set so that tokens can be claimed
Now let's use this smart wallet to claim an ERC20 token from a token drop contract!
First, we will get the contract instance of an ERC20 token drop contract using the getContract method.
Then, we will get the balance of the ERC20 token using the balance method and log it to the console.
Finally, we will claim 1 ERC20 token using the claim method and log the transaction hash to the console.
// Claim a ERC20 token
const contract = await sdk.getContract(
  "0xc54414e0E2DBE7E9565B75EFdC495c7eD12D3823", // TokenDrop on goerli
);
const tokenBalance = await contract.erc20.balance();
console.log("ERC20 token balance:", tokenBalance.displayValue);
const tx = await contract.erc20.claim(1);
console.log("Claimed 1 ERC20 token, tx hash:", tx.receipt.transactionHash);
4. Run the Script
To run the script, run the following command:
yarn dev
Here, you will see the following output:
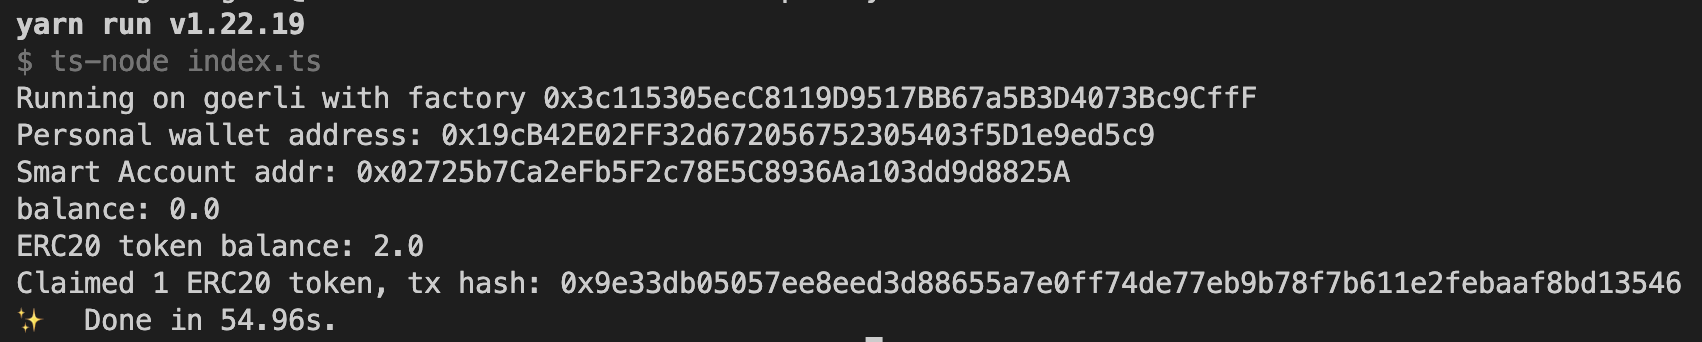
As you can see, upon claiming the token, the smart wallet is deployed. This is because smart account contracts are deployed when the first transaction is initiated.
We have successfully deployed a smart wallet using our factory contract and claimed an ERC20 token!
Conclusion
In this guide, we have learnt how to use the wallet SDK with the TypeScript SDK to create a smart wallet and claim an ERC20 token.
Take a look at the GitHub Repository for the full source code!